Showing posts with label Caramel. Show all posts

Tuesday, 25 April 2023

Cadbury Caramel Blondies

Hello

안녕하세요

(Annyeonghaseyo)

こんにちは

(Konnichiwa)

你好

(Ni Hao)


It's been a while since I baked and posted about blondies, I made these back in February as a snack for myself and Mary while we were in Birmingham for a couple of days.
This is another recipe from Fitwaffle Kitchen.

Let's get baking!


Ingredients:
115g Unsalted butter
225g White chocolate, broken into chunks
2 Large eggs
70g Granulated sugar
2 tsp Vanilla extract
155g Plain flour
1 tsp Salt
180g Dairy Milk caramel
70g Carnation caramel, warmed

Line a baking tin with parchment and pre-heat your oven to 150C (Fan).

Start off by melting the white chocolate and butter together, I always use the bain marie method, I also couldn't get my hands on enough white chocolate as I found it too expensive, so I topped the white chocolate up with caramilk chocolate.

In a separate bowl, add the eggs and whisk until foamy.

Then add the sugar and vanilla extract and mix them into the mixture.

Next pour in the chocolate mixture and whisk until combined.

Next sift in the flour and salt and fold into the mixture.


Next add the dairy milk caramel chunks and fold them into the mixture.

Scoop the mixture into your lined tin and drizzle over the warm carnation caramel, then feather with a knife. Then bake for 25-30 minutes, or until the top is crisp and light brown, and allow to fully cool in the tin.

Once fully cooled, you're ready to cut into slices and enjoy.

This recipe was really easy to follow and wasn't too time consuming.
I really liked the flavours, I'd definitely bake these again, they're definitely the perfect treat for any occasion.

If you would like to check out the recipe I followed, then head over to Facebook and check out Fitwaffle Fudgy Dairy Milk Caramel Blondies, as well as her other great bakes.
She also has her own baking recipe books, which you can purchase on Amazon and Waterstones.

See you soon!


안녕
(Annyeong)
さようなら
(Sayonara)
再见
(ZaiJian)
Bye

Thursday, 2 March 2023

Banoffee Pie

Hello

안녕하세요

(Annyeonghaseyo)

こんにちは

(Konnichiwa)

你好

(Ni Hao)


Last year, one of the desserts I baked for Christmas day was a Banoffee Pie, this recipe comes from Jane's Patisserie.

Let's get baking!

Ingredients:

Biscuit Crust:
300g Digestive biscuits
150g Unsalted butter (melted)

Filling:
375g Caramel
2-3 Large bananas (sliced)

Topping:
450ml Double cream
50g Icing sugar
25g Chocolate curls

Start off by crushing your biscuits, you can use a food processor for this, or even use a rolling pin to crush them up. I use my Nutri Bullet for mine, gives me a really fine crumb.

Pop your butter into a small pan and gently melt.
Once melted add to your biscuits and mix together well.

Press the biscuit base into the sides of a loose bottom tart tin, or even a loose bottom cake tin.

Next pour your caramel onto your biscuit base and smooth over.

Next slice your bananas and push them into the caramel.

In a large bowl, whip your double cream and icing sugar into soft peaks.


When ready, pipe or spread over the top of the caramel and bananas.

Sprinkle over some chocolate curls, slice and serve.

I've never made a Banoffee Pie before and this recipe was really easy to follow and make and it went down a treat.
It tasted really nice and I've even made another to take to work for some people, even they said it tasted really nice.
This will definitely be a regular bake because it's just divine.

If you would like to check out and follow the original recipe then head over to Banoffee Pie! on Jane's Patisserie website.

See you soon!


안녕
(Annyeong)
さようなら
(Sayonara)
再见
(ZaiJian)
Bye

Friday, 27 November 2015

Baked Goods: Rolo Caramel Cheesecake

Hello
An nyeoung
Konnichiwa
Ni hao


I was going to do a baking post on a Mary Berry cupcake recipe that I always tend to follow but I found a cheesecake recipe that I couldn't resist and had to have a go at making it. I found this recipe while I was having a nosey on my personal Facebook newsfeed and my mouth watered at the sight of it, let me show you how I made it.


Ingredients:
150g Digestives
150g Golden oreos/Vanilla crunch biscuits
125g Butter
250g Mascarpone cheese
250g Philadelphia cheese
1tsp Vanilla bean paste
100g Icing sugar
150g Carnations caramel
300ml Double cream
175g Rolo sweets, chopped
Caramel sauce
Rolo Sweets
Whipping cream

I lined my pie tin with greaseproof paper to make it easier to get the cheesecake out when it came to serving, I used a loose bottom pie tin.

I then separated my biscuits, I did originally wrap them in tin foil to bash with a rolling pin as I had ran out of cling-film but the tin foil ripped easily so popped the separated biscuits into a jug and bashed with a rolling pin till they were all crushed for a biscuit base.

I then melted the butter and poured into the crushed biscuits to make the biscuit base.


Next I spread the biscuit base along the bottom of my pie tin and placed the base in the fridge.

While the base was chilling in the fridge I made a start on the filling.

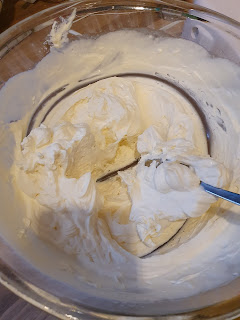
In a large mixing bowl I placed both the cream cheeses (mascarpone & Philadelphia), vanilla bean paste, icing sugar and the carnations caramel and whisked with an electric hand mixer on a medium speed until smooth, this took about a minute for me it could take less.


Next in goes the double cream and whisk on a medium-high speed until the mixture is thick and like a mousse, this could take a few minutes, it should hold like meringue if it's not mixed well it won't set properly.

Next take the 175g of the rolo sweets and chop into quarters and fold them into the cheesecake filling, then pour the filling onto the base and spread out, once done put back into the fridge to set for 5-6 hours or overnight.

Before serving I decorated the cheesecake by whisking the whipping cream piping onto the cheesecake in peaks all the way round, on top of each cream peak I paced a rolo sweet and then drizzled with some caramel sauce, I used a salted caramel sauce.


Then it's ready to be served.


If you want to do this recipe for yourself then feel free to follow my post or check out the recipe that I used via Jane's Patisserie where she gives a lot more tips on making this cheesecake. This Christmas I'm going to be making two cheesecakes for at my sister's on Christmas day and I'm going to be doing a vanilla cheesecake and a chocolate orange cheesecake, so keep an eye out for them in future posts.

See you soon!


An nyeoung
Sayonara
Zai jian
Bye